Access Level Required: Owner, Manager or Front Desk
Introduction: Owners and Managers can create and send custom MMS campaigns to their clients with SENT by AURA Salonware. Filter by Appointment Dates, Providers, Services, Products, and Hair Type to target the desired audience. The campaign can be created and sent immediately or scheduled for future date.
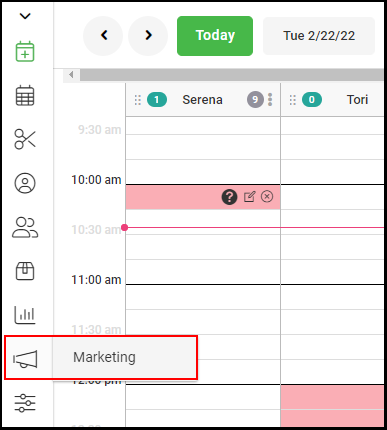
1. Select "Marketing" from the left navigation menu.
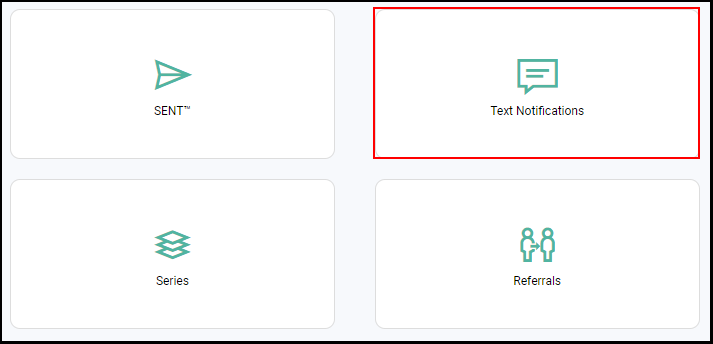
2. Select "Text Notifications".
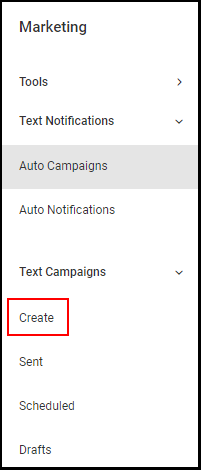
3. Select "Create" from the "Text Campaigns" side menu drop down.
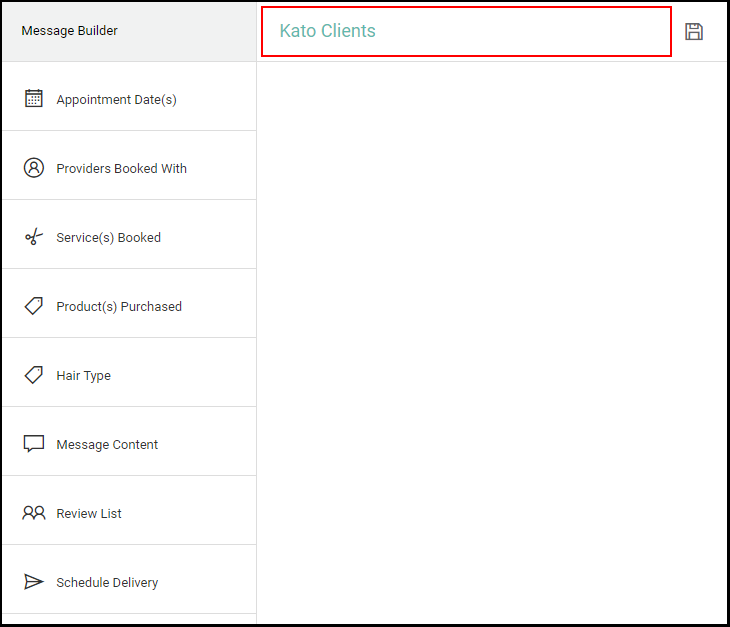
4. Enter a name for the campaign.
NOTE: The name of the campaign will not be visible to the campaign recipients.
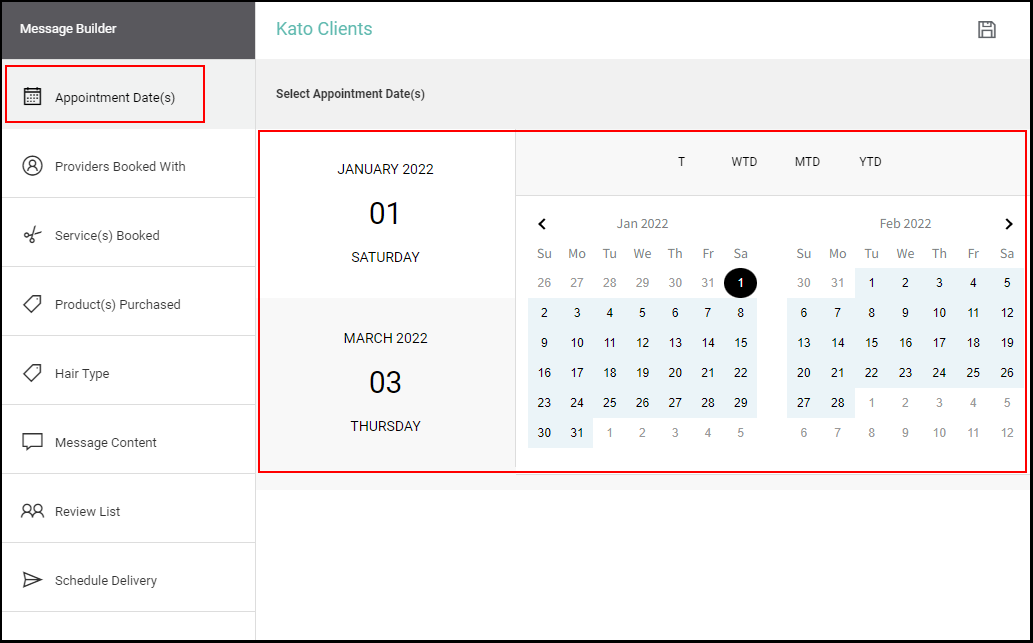
5. Select a date on the calendar to set the start date (1) and select a second date to set the end date (2). Or use the Date Picker T (Today), WTD (Week to Date), MTD (Month to Date, or YTD (Year to Date)
NOTE: Clients who have had an appointment on the books during the selected date range will be included in the campaign.
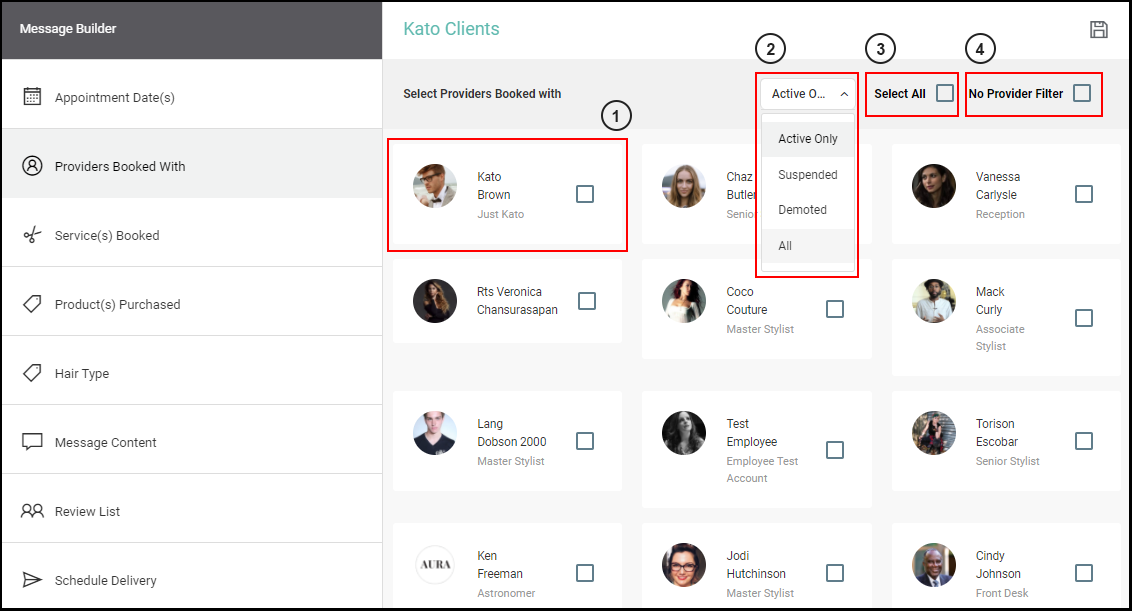
6. Select "Providers Booked With" from the left side menu.
- (1) To target a specific provider, select the check box adjacent to the provider name
- NOTE: More than one provider can selected
- (2) Choose from "Active Only", "Suspended", "Demoted", or "All" from the drop down to filter the employee list
- Active Only: Active employees that offer services
- Suspended: Employees that offered services but are now suspended
- Demoted: Employees that offered services but were demoted to a client
- All: Active, Suspended, and Demoted employees that offer or offered (if suspended or demoted) services
- (3) Choose "Select All" to target all clients who have booked with a provider
- (4) Choose "No Provider Filter" to skip the "Providers Booked With" filter
- NOTE: By selecting "No Provider Filter", any client who did or did not book with a provider will be added to the list dependent upon the other message builder filters applied
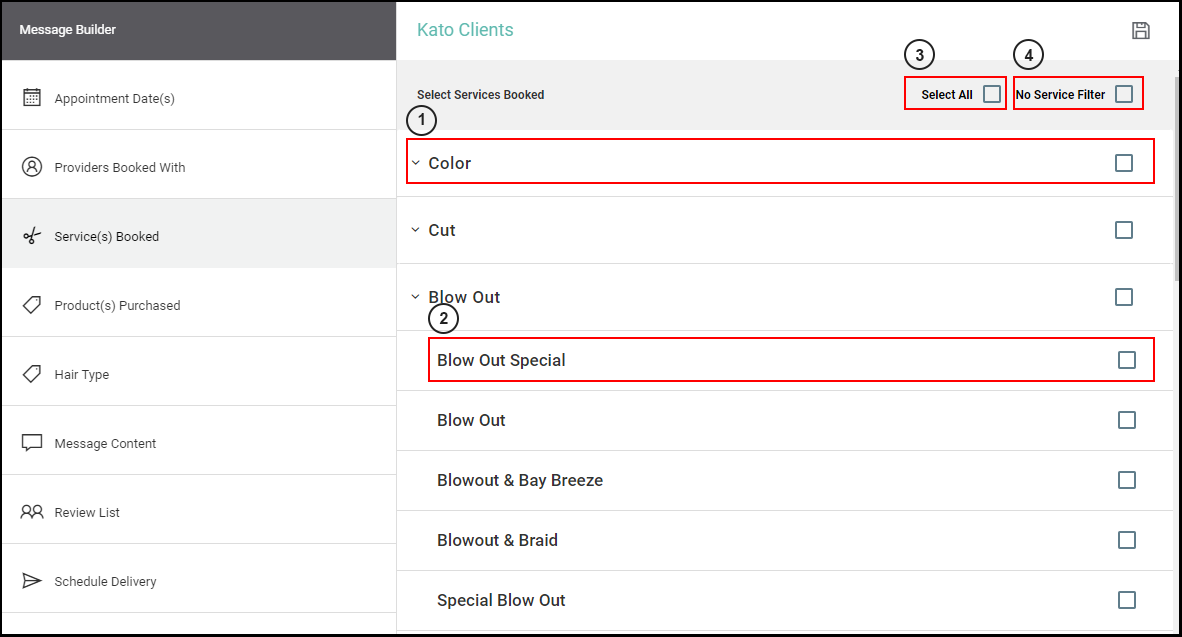
7. Select "Services Booked" from the left side menu. Target any clients who have or have not received services.
- (1) Select the checkbox adjacent to a service category to only target clients who have received services within the category
- (2) Select the checkbox adjacent to an individual service to only target clients who have received that service
- (3) Choose "Select All" to include all clients that have received any service within the specified date range
- (4) Select "No Service Filter" to skip the "Services Booked" filter and include all clients who have received services and those who have not
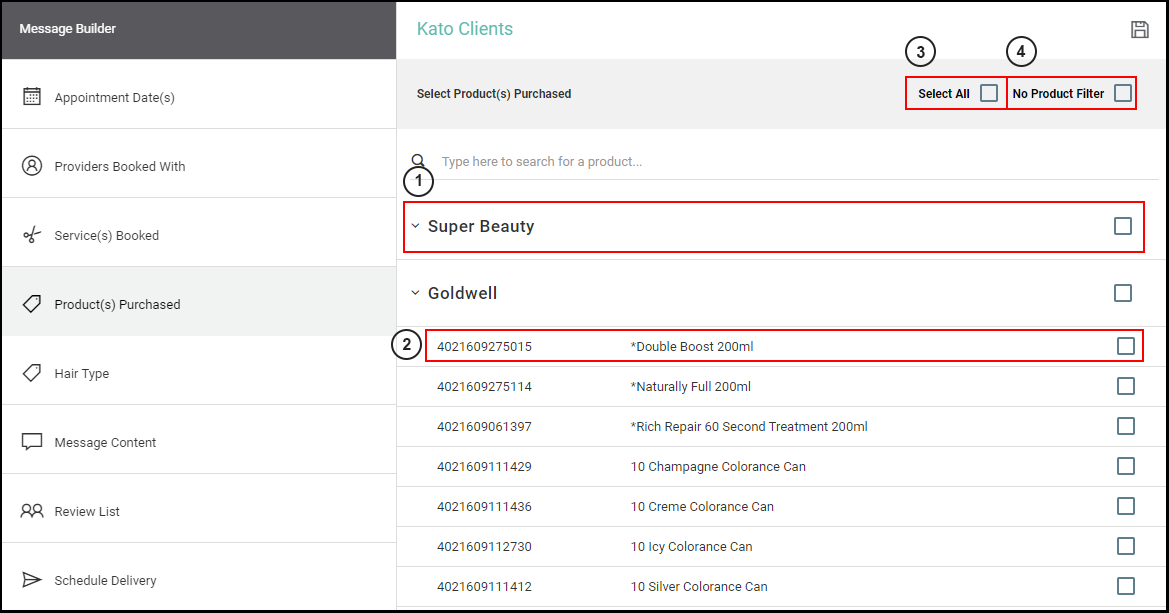
8. Select "Products Purchased" from the left side menu. Target any client's who have or have not purchased products.
- (1) Select the checkbox adjacent to a product supplier to only target clients who have purchased products within that supplier
- (2) Select the checkbox adjacent to an individual service to only target clients who have received that service
- (3) Choose "Select All" to include all clients that have purchased any product within the specified date range
- (4) Select "No Service Filter" to skip the "Products Purchased" filter and include all clients who have purchased retail and those who have not
NOTE: Only active retail products may be chosen. Inactive and professional products are not listed.
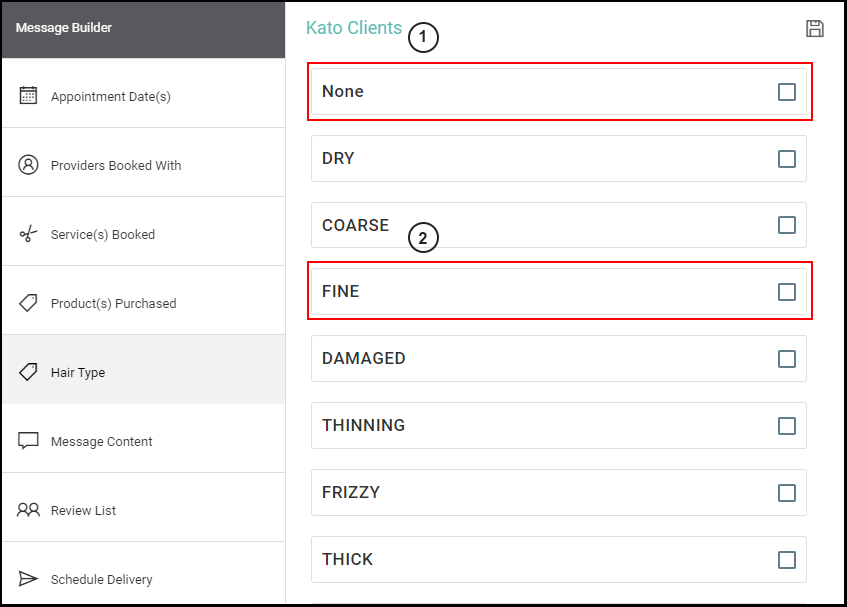
9. Select "Hair Type" from the left side menu.
- (1) Select "None" to target client's with no hair type entered within their client profile
- (2) Select the checkbox next to a specific hair type to target clients with that hair type that have visited the salon during the specified date range
NOTE: Hair Type is a field in the client profile. It is not necessary to select None if you do not wish to use the Hair Type filter.
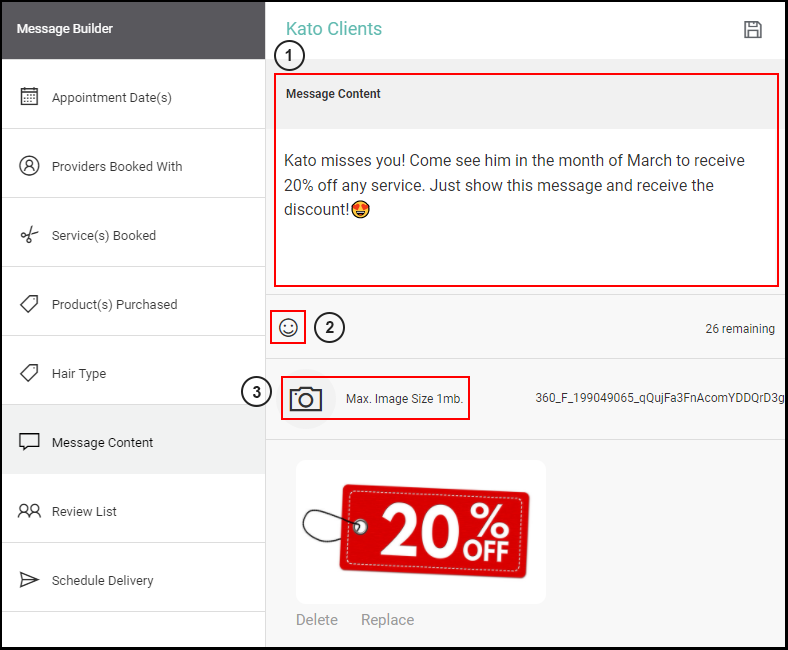
10. Select "Message Content" from the left side menu then build the message content.
- (1) Enter the message content
- (2) Add an emojis of your choosing
- (3) Upload an image to attach to the message
- NOTE: The maximum allowed file size is 1 MB. .jpg and short animated .gif files can be sent.
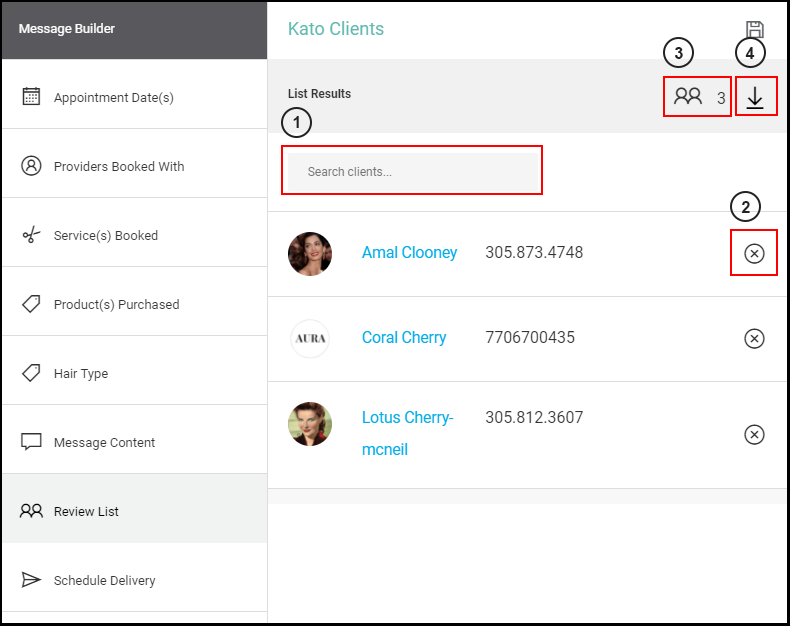
11. Review your list.
- (1) Search clients within the displayed client list
- (2) Select "X" to remove a client from the recipient list Search clients within the displayed client list
- (3) View the total amount of clients within your list
- (4) Download the targeted client list
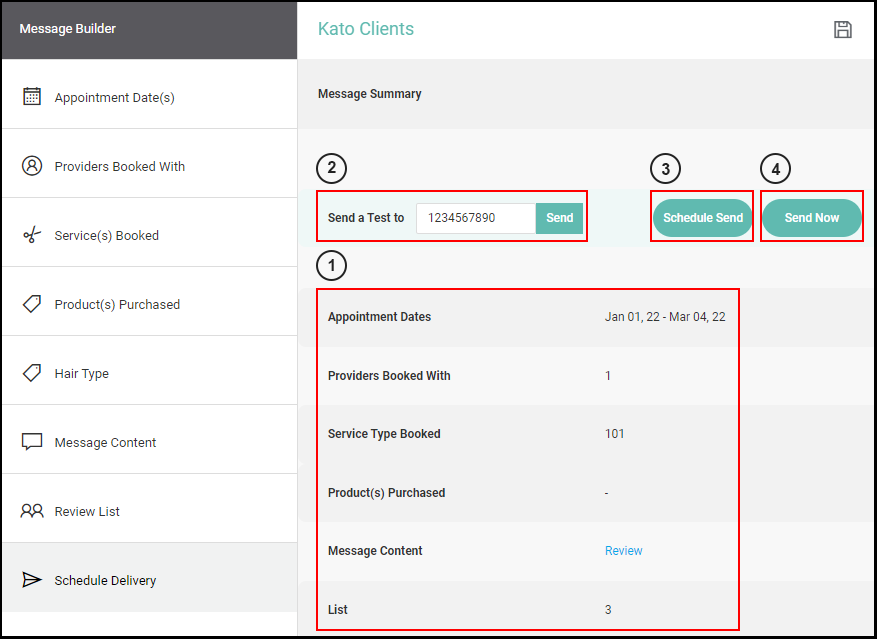
12. Select "Schedule Delivery" from the left side menu.
- (1) Review the details of the campaign
- (2) Send a test to specific number(s) by entering a singular phone number or multiple phone numbers (separated by commas) in the "Send a Test to" field
- (3) Once the campaign is ready to send, select "Schedule Send" to choose a future date and time to send the campaign
- (4) Or select "Send Now" to send the campaign immediately