Access Level Required: Owner and Manager
Learn how to create and use Auto Campaigns and Auto Notifications
Click here for the video.
1. If your Salon has multiple locations, select the location on the top of the screen
NOTE: If your salon only has one location, skip this step and proceed to Step #2.

2. Go to "Marketing" on the left side menu.

3. Select "Text Notifications".

4. Select "Auto Notifications" from the left side menu.

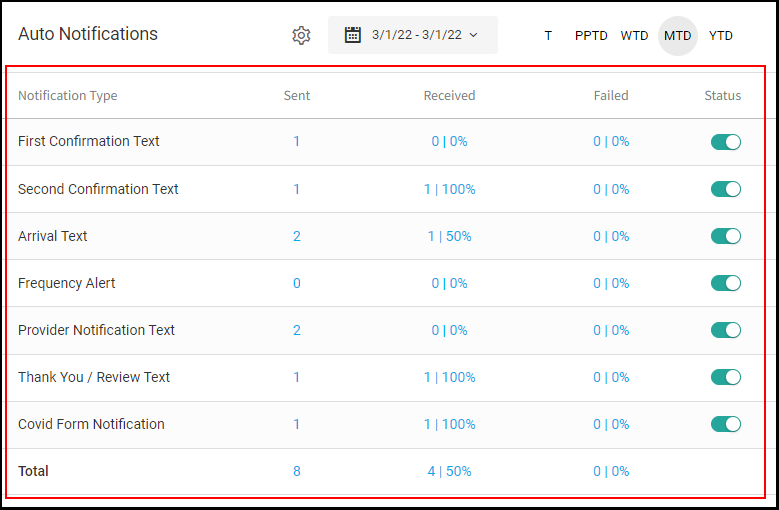
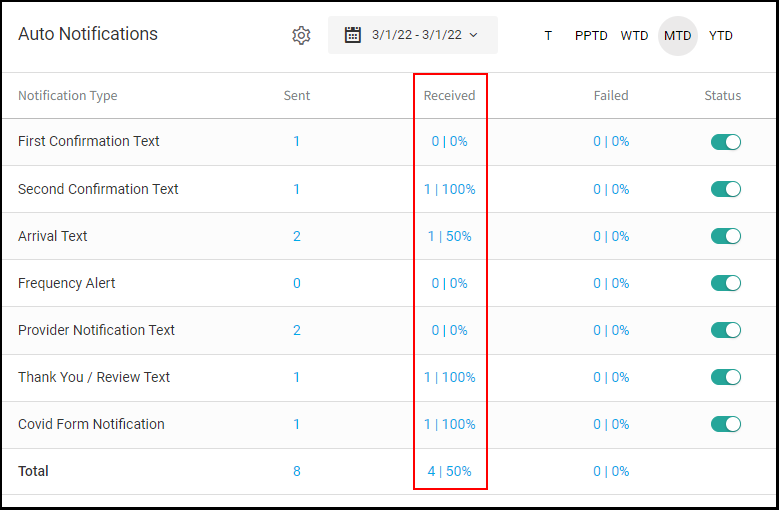
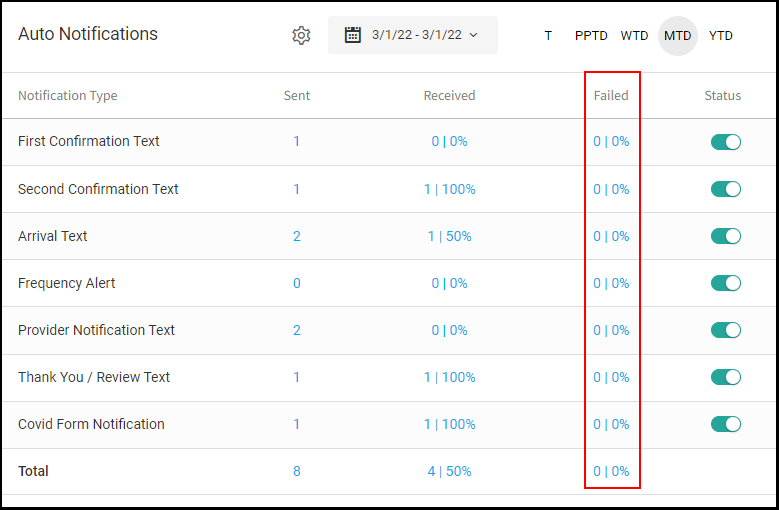
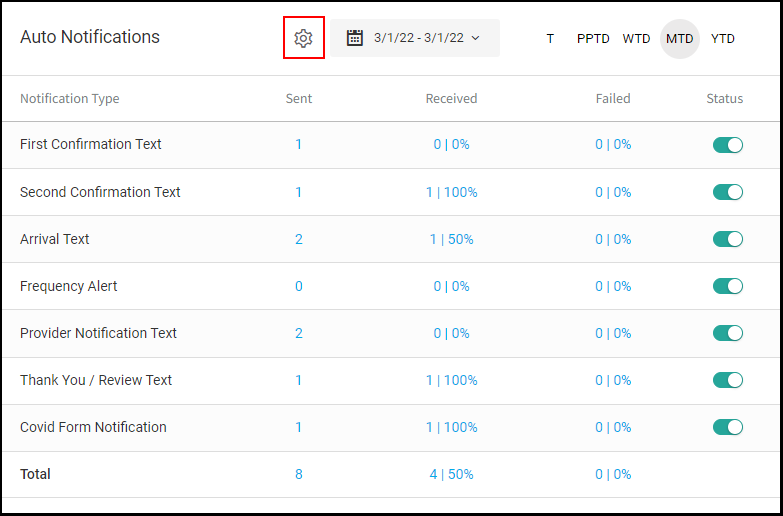
5. Here you will see a list of all automated text notifications along with the number and percentage that have been sent, received and failed.
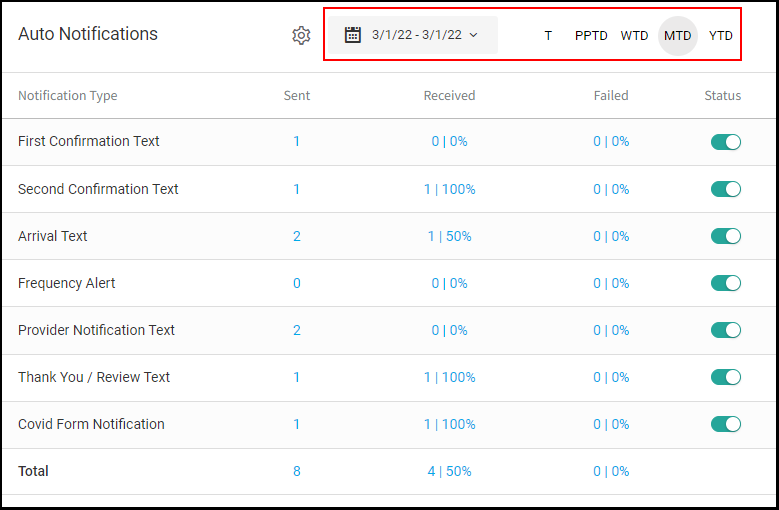
6. Use the date picker or shortcuts to view text activity for a specific date range.
NOTE: Date shortcuts include Today, Pay Period to Date, Week to Date, Month to Date and Year to Date.
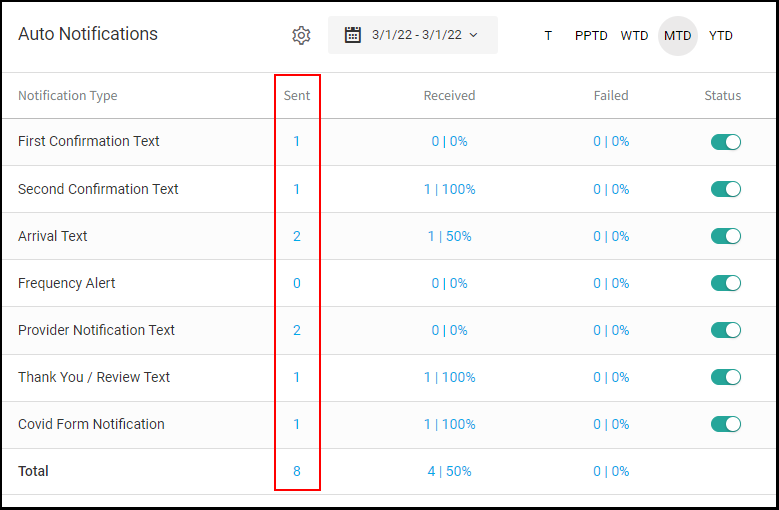
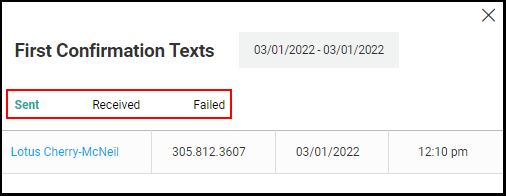
7. Select the value under "Sent" to display a popup that indicates which clients have been sent a specific notification, along with the date and time it was sent.
8. Select the value under "Received" to display a popup that indicates which clients have received a specific notification, along with the date and time they received it.
9. Select the value under "Failed" to display a popup that indicates which clients failed to receive the text notification.
Note: Failures are often due to the destination carrier blocking the message from being delivered.
10. The pop-up when selecting values within Sent, Received, or Failed appears like the below.
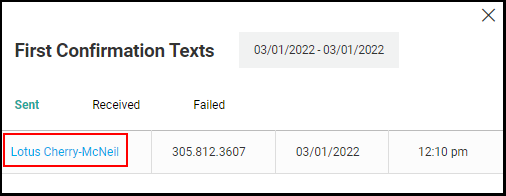
11. Selecting any client name on the Sent, Received or Failed popup will direct you to the client's profile.
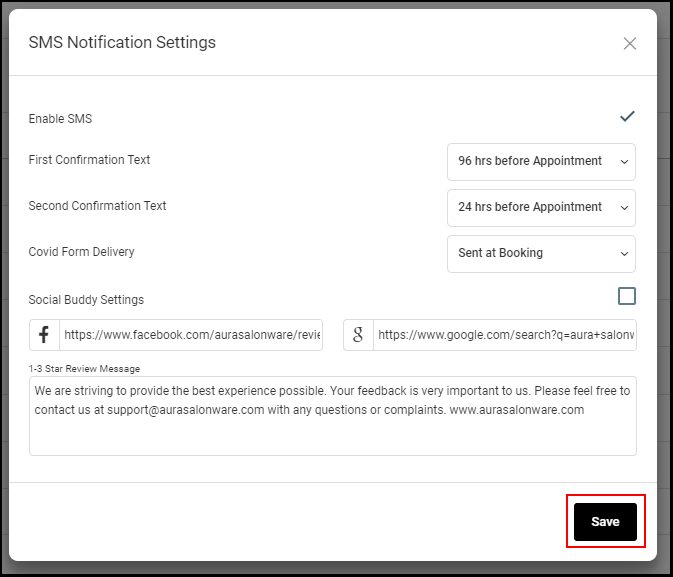
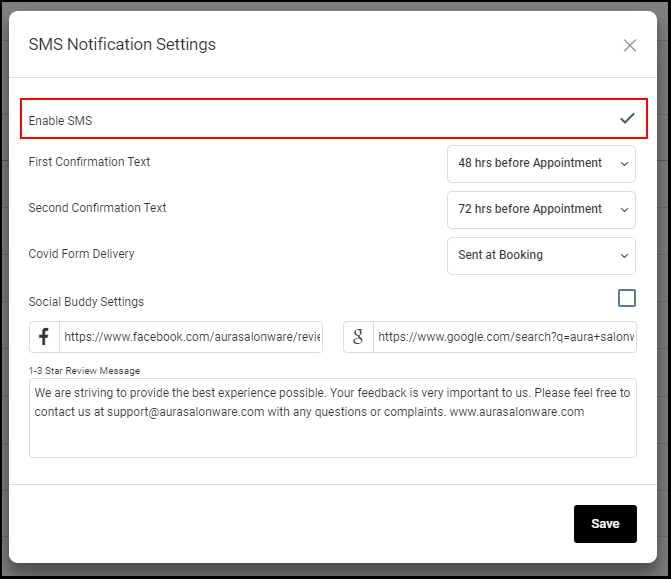
12. The "Settings" dial to view the SMS Notification Settings.
13. To enable or disable SMS, select or deselect the check box.
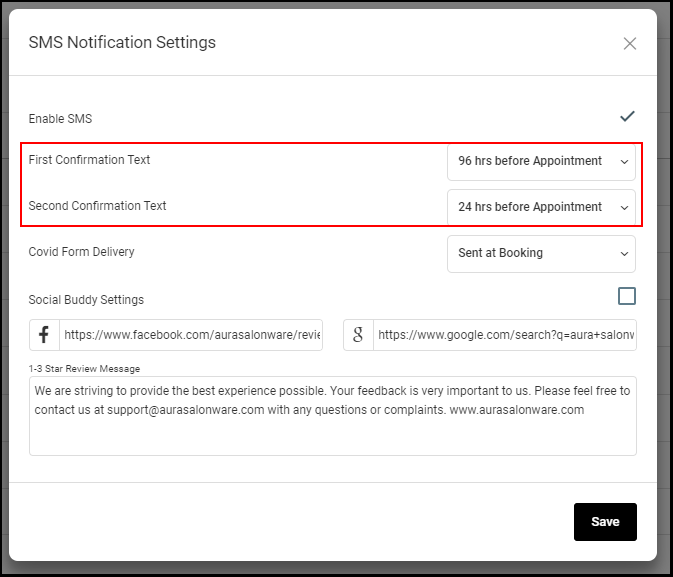
14. Set the "First and Second Confirmation Texts" by using the "hrs before Appointment" drop down.
NOTE: Aura recommends sending the Second Confirmation Text after the First Confirmation Text.
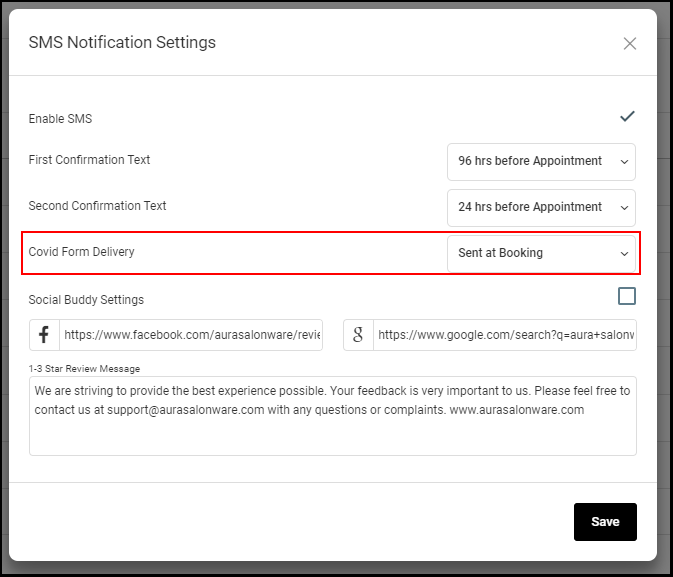
15. Select when the Covid Form should be sent to the client by using the "Covid Form Delivery" drop down.
16. Checking the box adjacent to "Social Buddy Settings" activates Social Buddy. To learn more about Social Buddy, click HERE.
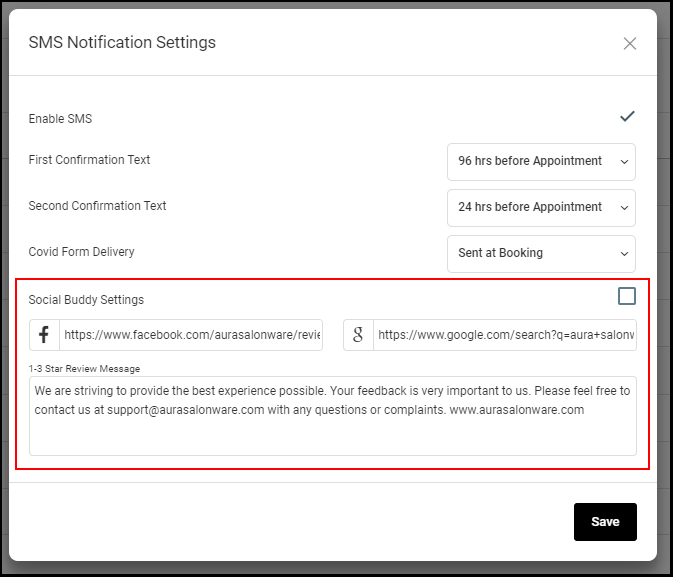
17. Select "Save".